
 Granting Financial Authority
Description
The Granting Financial Authority application is used to maintain delegate financial responsibility for an Activity or Project. It also captures and maintains all the signatures for authorized individuals. It will be used by central administration to verify that financial transactions are authorized by the correct individuals.
The term “Account” will be used for Activities or Projects for the rest of this help page.
Roles:
The following Roles can be assigned in the Granting Financial Authority application:
- All Financial Transactions – This includes but is not limited to:
- Payment Requests. (ePR)
- UShop
- UShop Approvals Only.
- Individuals with this role cannot approve Payment Requests
- EOR Designee
- Individuals with this role cannot approve financial transactions.
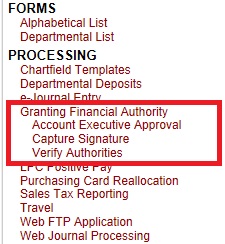
Navigation to Granting Financial Authority
- Log in to CIS
- Financial & Business Services pagelet
- PROCESSING
- Grant Financial Authority
Definitions
- Capture Signatures
- Designate Alternate(s)
- Verify Authority
- Updating Expiring Alternates
- How to Terminate an Alternate
 Clearing cache and cookies can resolve many issues. Click here to learn how.
GFA FAQ
- How do I capture my signature?
- How do I add one or more Alternates to a Project or Activity?
- How do I add an Alternates to one or more Projects or Activities?
- How does an Account Executive approve Alternates?
- How do I update an Alternates access to a Project or Activity?
FS Training
We have produced another GFA video; this one that demonstrates how Account Executives can approve “Designate Alternate(s)” requests.
Our three GFA videos are:
Other Resources
To use the new Granting Financial Authority Click here. It is also available in the Processing section of the FS pagelet in CIS:
- Learn more about GFA here.
- Read the FS News article announcing GFA
 Not finding an answer to your question, Ask Us!
Capture Signature
An image of your signature must be captured, to be compared against financial documents. Signatures can be captured using touch screens on laptops or mobile devices, or for those skilled with a mouse, even on a computer. The signature needs to be inside the provided box. To capture signature:
- Click on the Capture Signature menu item.
- Sign in the box (a stylus is best, but not necessary)
- Click Continue
- Input initials in the Initials box
- Click continue
- View signature and initials. If acceptable, click Capture Signature button, if not click Go Back. You can practice until you are satisfied with the signature.
- An email will be sent verifying that you are the one who captured the signature
Once the signature has been captured, it can be changed by clicking on the “Capture Signature” link. Click on this link to see how to capture a signature.
Designate Alternates
Designate Alternate(s) in the menu bar allows you to add/change a person on multiple Accounts, or add/change multiple people on a Single Account. The Account Executive will approve these requests as to who can authorize financial transactions for an Account.
 One Account to Many Alternates
One or more employees may be assigned to a specific Org/Activity/Project using this option.
- Search by Org/Activity/Project
- BU
- 01
- 02
- 04
- Org
- Activity
- Project
- BU
Results
The search results will display in a table with the following columns:
- Select All/Deselect All (sortable)
- Delete
- Account Executive (sortable)
- Type (sortable) – If you want all “Types”to be the same, select the type in the Header row and select “Fill Down”
- All Financial Transactions
- UShop Approvals Only
- EOR Designee – You need to have access to Management Reports to use the Evidence of Review (EOR) application.
- Date From – If you want all “Dates” to be the same, input the date in the Header row and select “Fill Down”
- Date To – If you wish to revoke the authority of a person, it is done by putting an end date of the last day you wish the person to have authority. If you want all “Dates” to be the same, input the date in the Header row and select “Fill Down”
- Status
 One Alternate to Many Accounts
If a person needs to be added/changed on multiple Account(s), this can be accomplished using the One Alternate to Many Accounts menu item. This opens up with a criteria page to search for the person and the Account(s) to be added/changed:
- Add this person
- Account Alternate Name/EmplID – Start typing the last name – OR – Employee ID (The ID must begin with a 0, not a u). As you type, the application will start displaying possible choices. Select the desired employee.
After choosing the employee, then search by Org/Activity/Project – OR – Account Executive or Alternate (separate tab)
- Search by Org/Activity/Project
- BU
- 01
- 02
- 04
- Org
- Activity
- Project
- BU
- Search by Account Executive or Alternate
- Account Executive
- Other Account Alternate
Search Results
The search results will display in a table with the following columns:
- Select All/Deselect All (sortable)
- OrgID (sortable)
- Funding Source (sortable)
- Description (sortable)
- Account Executive (sortable)
- Fund (sortable)
- Type (sortable) – If you want all “Types”to be the same, select the type in the Header row and select “Fill Down”
- All Financial Transactions
- UShop Approvals Only
- Date From – If you want all “Dates” to be the same, input the date in the Header row and select “Fill Down”
- Date To – If you wish to revoke the authority of a person, it is done by putting an end date of the last day you wish the person to have authority. If you want all “Dates” to be the same, input the date in the Header row and select “Fill Down”
Select rows to change, input type and date range and click “Submit”
 Account Executive Approvals
Account Executives approve requests in this section. Requests are displayed in a table with several columns. Select Approve or Deny in the drop-down for each line. An informational popup displays upon navigation to this screen, that the user must close. If you do not see this popup, and your screen seems “frozen”, try hitting enter or escape to continue.
- Approval (if red x appears, hover over it to see message)
- No Action
- Approve
- Deny
- Account Alternate Name/EmplID
- Funding Source
- Description
- Account Executive
- Fund
- Date From
- Date To
Verify Authority
Verify Authority is used to view/verify who can spend on a specific Account.
- Search by Org/Activity/Project
- BU
- 01
- 02
- 04
- Org
- Activity
- Project
- BU
- Date From
- Date To
Results include:
- Account Alternate Name/EmplID
- Type
- Date From
- Date To
- Status
All individuals who have been granted authority (or pending requests) will be displayed. This includes hierarchy up to the President. After viewing the results from Verify Authority, changes can be made in Designate Alternate(s)
Updating Expiring Alternates
The term of an Alternate will expire based on the Date To that was originally submitted. To extend the authority of an Alternate to sign Financial Documents for an Activity or Project, a new row will need to be submitted into the application. Once the new row is submitted and approved, the old row will no longer be valid. For historical and audit purposes, the row is stored in the database.
The process of adding a new row is still the same as when the first original row was added. This video shows how to add a person into the application. Here are the different ways to update an Alternate:
One Account to Many Alternates
Access the application the same as when adding a new Alternate. All the Alternates assigned to the application will be displayed with the End Date information. To update the expiring Alternates, click the plus sign and put in the new information (similar to when the Alternate was added the first time).
One Alternate to Many Accounts
Access the application the same as when adding a new Alternate to many Accounts. After entering in the Alternate ID and the search criteria, the Alternates’ information will be displayed. The only difference is that the current row will be displayed with a blank row after, which is used to add the new information. Enter the new information in the applicable blank rows and click submit.
Alternate desiring to update access across multiple Orgs and AE’s
Access the One Alternate to Many Accounts section of the application. Input the Alternate Name/EmplID in the search box. Instead of using the search criteria below, click the Update button. This will display all the Activities and Projects for which the Alternate has authority to sign. Each row will have a blank row below it, which is used to add the new information. Enter the new information in the applicable blank rows and click submit.
Approval Needed
If the Account Executive submits the changes, the changes are automatically approved. If submitted by someone else, the Account Executive will need to approve the request. See approvals.
How to Terminate an Alternate
For changes that require the Alternate no longer have the authority to sign (transfers, termination etc), the application will need to be updated. To keep an audit history, rows are not deleted from the application. To terminate the authority, enter a new row using the steps above, using the last date they had authority to sign on the Activity/Project as the Date To. Use the same date from the existing row for the Date From. This will ensure that documents they signed prior to the change will still process.
 the desired Activity in the appropriate criteria box. This is a smart search and will auto-fill as you type. When the desired Activity or Project appears select it and click on the “Search” button.
 “Add” button to add Alternates to the Activity or Project.
 first column for each Alternate being added.
 “Confirm” button on the pop-up window. If the pop-up window does not appear, press the “Enter” key on your keyboard. This request is now complete and will need to be approved by the Account Executive.
 in the “Account Alternate Name/EmplID” field. 2. Do
  to add the Alternate by checking the box in the first column.
 displayed with all the Activities and/or Projects and the pending Alternates. This list will be covered by an instruction page. Please click the “Close” button. If the pop-up window does not appear, press the “Enter” key on your keyboard.
 with all the Activities and/or Projects and the pending Alternates. This application is wanting you to approve/deny each request. A date range that each Alternate would have the authority to sign on your behalf is displayed
 you can select “Approve All” in the drop down list at the top. Or if you disagree with all the pending Alternates”, you can select “Deny All” in the drop down list at the top.

 appear with all your selections.
 displaying the current access for the Alternate.
